
-
All Products
- Hydraulic Power Systems & Components
- Hydraulic Pumps & Accessories
- Hydraulic Motors & Accessories
- Hydrostatic Transmissions
- Cylinders & Accessories
- Steering Units & Accessories
- Hydraulic Valves & Accessories
- Ball Valves
- Check Valves
- Check Valves (Pilot-Operated)
- Counterbalance Valves (Overcenter Valves)
- Cushion Valves (Double Relief Valves)
- Directional Control Valves
- Flow Control Valves
- Flow Divider Valves
- Gate Valves
- Logic Element Valves
- Needle Valves
- Plug Valves
- Pressure Reducing Valves
- Relief Valves
- Sandwich Valves
- Premium Selector Valves
- Hydraulic Filters & Accessories
- Power Units
- System Accessories
- High Force Hydraulics
- Hydraulic Pumps & Accessories
- Pneumatic Power & Control
- Pneumatic Cylinders
- Pneumatic Valves & Accessories
- Pneumatic Air Line Filter, Regulator, & Lubicator (FRL's)
- Pneumatic Air Line Filters
- Premium Air Tool Hose Assemblies
- Air Line Lubricating Oil
- Safety Pop-Off Valves
- Pneumatic Air Line Filter & Regulator
- Pneumatic Air Line Filter Accessories
- Pneumatic Air Line Lubricators
- Pneumatic Air Tools
- Pneumatic Air Line Filter, Regulator, & Lubricator (FRL's)
- Pneumatic Air Line Regulators
- Pneumatic Cylinder Accessories
- Fluid Conveying
- Hose Products
- Tubing Products
- Piping Products
- Adapters
- Steel
- O-Ring Face Seal Braze Adapters
- O-Ring Face Seal To Straight Thread O-Ring
- O-Ring Face Seal To Pipe
- O-Ring Face Seal To 37° Flare
- O-Ring Face Seal To O-Ring Face Seal
- O-Ring Face Seal Accessories
- Pipe To Pipe
- Pipe to 37° Flare
- Pipe To Straight Thread O-Ring
- Pipe To Hose
- 37° Flare Union
- Straight Thread O-Ring to 37° Flare
- Straight Thread O-Ring to Straight Thread O-Ring
- Straight Thread O-Ring to Hose
- SAE Split Flange To 37° Flare
- SAE Split Flange To O-Ring Face Seal
- Braze & Weld to 37° Flare
- 42° Inverted Flare to 37° Flare
- Restrictor
- Metric to 37° Flare
- Metric to Pipe
- Metric
- BSPP to 37° Flare
- BSPP to Pipe
- BSPP to Metric
- BSPP to BSPT
- BSPP
- BSPT To Pipe
- BSPT To 37° Flare
- JIS
- JIS 30° Seat (BSPP Thread) To 37° Flare
- Komatsu, Kobelco
- BSPP to 37 deg Flare
- BSPT To JIS
- 37 deg Flare Union
- Pipe to 37 deg Flare
- Straight Thread O-Ring to 37 deg Flare
- O-Ring Face Seal To BSPP
- SAE Split Flange To 37 deg Flare
- Straight Thread O-Ring to Metric
- Metric to 37 deg Flare
- Straight Thread O-Ring to Pipe
- 37 deg Flare Plug
- BSPT To 37 deg Flare
- JIS 30 deg Seat (BSPP Thread) To 37 deg Flare
- O-Ring Face Seal To JIS
- Straight Thread O-Ring to BSPP
- O-Ring Face Seal To Metric
- SAE Split Flange To Pipe
- Auxiliary Components
- O-Ring Face Seal To 37 deg Flare
- Straight Thread O-Ring to JIS
- Braze & Weld to 37 deg Flare
- Metric to BSPT
- Pipe To STC (Snap to Connect)
- BSPP To Hose
- Flareless Fittings
- Braze & Weld to Pipe
- SAE Split Flange To SAE Split Flange
- SAE Split Flange To Straight Thread O-Ring
- 42 deg Inverted Flare Union & Accessories
- Push-to-Connect To STC (Snap to Connect)
- O-Ring Face Seal To STC (Snap to Connect)
- BSPT
- Stainless Steel
- Pipe To Pipe
- Pipe To 37° Flare
- 37° Flare Union
- Straight Thread O-Ring To 37° Flare
- Metric To 37° Flare
- BSPP To 37° Flare
- Auxiliary Components
- Metric
- BSPP
- 37 deg Flare Union
- BSPP To Pipe
- Straight Thread O-Ring To Pipe
- Pipe To 37 deg Flare
- BSPP To 37 deg Flare
- Metric To Pipe
- Metric To 37 deg Flare
- BSPP To Metric
- O-Ring Face Seal To Pipe
- Straight Thread O-Ring To 37 deg Flare
- BSPT To 37 deg Flare
- O-Ring Face Seal To Straight Thread O-Ring
- Straight Thread O-Ring To Straight Thread O-Ring
- SAE Split Flange To 37 deg Flare
- Pipe To Hose
- 37 deg Flare To Hose
- O-Ring Face Seal To O-Ring Face Seal
- 37 deg Flare Plug
- Straight Thread O-Ring To BSPP
- Braze & Weld to Pipe
- Metric to BSPT
- BSPT To Pipe
- BSPT
- Brass
- Pipe To Pipe
- Pipe To 37° Flare
- Pipe To 45° Flare
- 45° Flare Union
- 42° Inverted Flare To 45° Flare
- 42° Inverted Flare To Pipe
- 42° Inverted Flare Unions & Accessories
- Garden Hose Adapters
- Pipe To 45 deg Flare
- Braze & Weld to Pipe
- 42 deg Inverted Flare To Pipe
- 45 deg Flare Union
- BSPP
- 45 deg Inverted Flare Union
- Pipe To 37 deg Flare
- 37 deg Flare Union
- Pipe To Hose
- BSPP To Pipe
- 37 deg Flare To Hose
- BSPT To Hose
- 42 deg Inverted Flare To 37 deg Flare
- 45 deg Flare To Hose
- 45 deg Inverted Flare To Pipe
- BSPT
- 45 deg Inverted Flare To Hose
- BSPP to BSPT
- 37 deg Flare Plug
- 45 deg Inverted Flare To Tube
- O-Ring Face Seal Braze Adapters
- BSPP To Hose
- BSPT To Pipe
- Metric to Flare
- Stainless Steel Steel
- Steel
- Hydraulic Quick Disconnects
- Miscellaneous Fluid Conveying Parts
- Flanges
- Metric & BSP Seals & Washers
- Protective Closures
- Split Flange Kits & O-Rings
- Support Clamps
- Swivel Joints
- Air Brake Products
- Hose, Tube & Pipe Cleaning System
- Flange Accessories
- Hose, Tube & Pipe Cleaning System Accessories
- Brake Hose Accessories
- Hose Accessories
- Support Clamp Accessories
- Fitting Assortments
- Performance Parts
- Hose
- Adapters
- Brake System Adapters
- Fuel System Components
- Couplings
- PRO CLAMP and Overbraid
- Accessories
- Reusable Fittings for AQP & Starlite Racing Hose
- Crimp Fittings for AQP & Starlite Racing Hose
- Fittings for AQP Socketless Hose
- Reusable Fittings for Aeroquip FBF A/C Hose
- Fittings for Teflon Racing Hose
- Reusable Fittings for AQP High Pressure Hose
- Assembly Equipment
- Hydraulic Brake Components
- Hose Products
- Other Products
- Hydraulic Fluids & Oils for Industrial Systems
- Seals
- Industrial Chemical Maintenance Products
- Lubrication Equipment & Accessories
- Fasteners
- Valves
- Couplings
- Bearings
- Control Cables
- Thread Sealants
- Gloves
- Hand Tools
- Pressure Washer Products for Industrial & Commercial Use
- Hose Reels
- Winches
- Cable Hardware & Knobs
- Cable Remote Controls
- Industrial Corrosion Inhibitors
- Y Strainer
- Hose Nozzles
- Textbooks
- Cable (Wire) Ties
- Piston Vibrators
- Software Licenses
- Human Machine Interface & Accessories
- Safety Glasses
- Hydraulic Punches & Dies
- Thread Sealant Tapes
- Identification Tools
- Gasket Makers
- Threadlockers
- Tool Storage
- Hydraulic Power Systems & Components
-
Services
- 24/7 On-Site Mobile Services
- Control Cable Assemblies
- Crimper Maintenance Program
- Custom Hydraulic Components Fabrication
- Cut & Weld
- Danfoss x20 Stock Change Program
- Engineering Center Services
- Hose Kitting Services
- HPU Build Program
- Hydraulic & Industrial Hose Assemblies
- Hydraulic Repair & Service
- Tube Bending Services
- Vane Pump Build Program
- View All Services
- Branch Locations
- Catalogs
- Help
- Quick Order
SAME DAY SHIPPING
— Order by 2pm EST.
How to Replace Hydraulic Valves + Get the Parts You Need
Published August 10, 2026 | Last Updated August 14, 2026
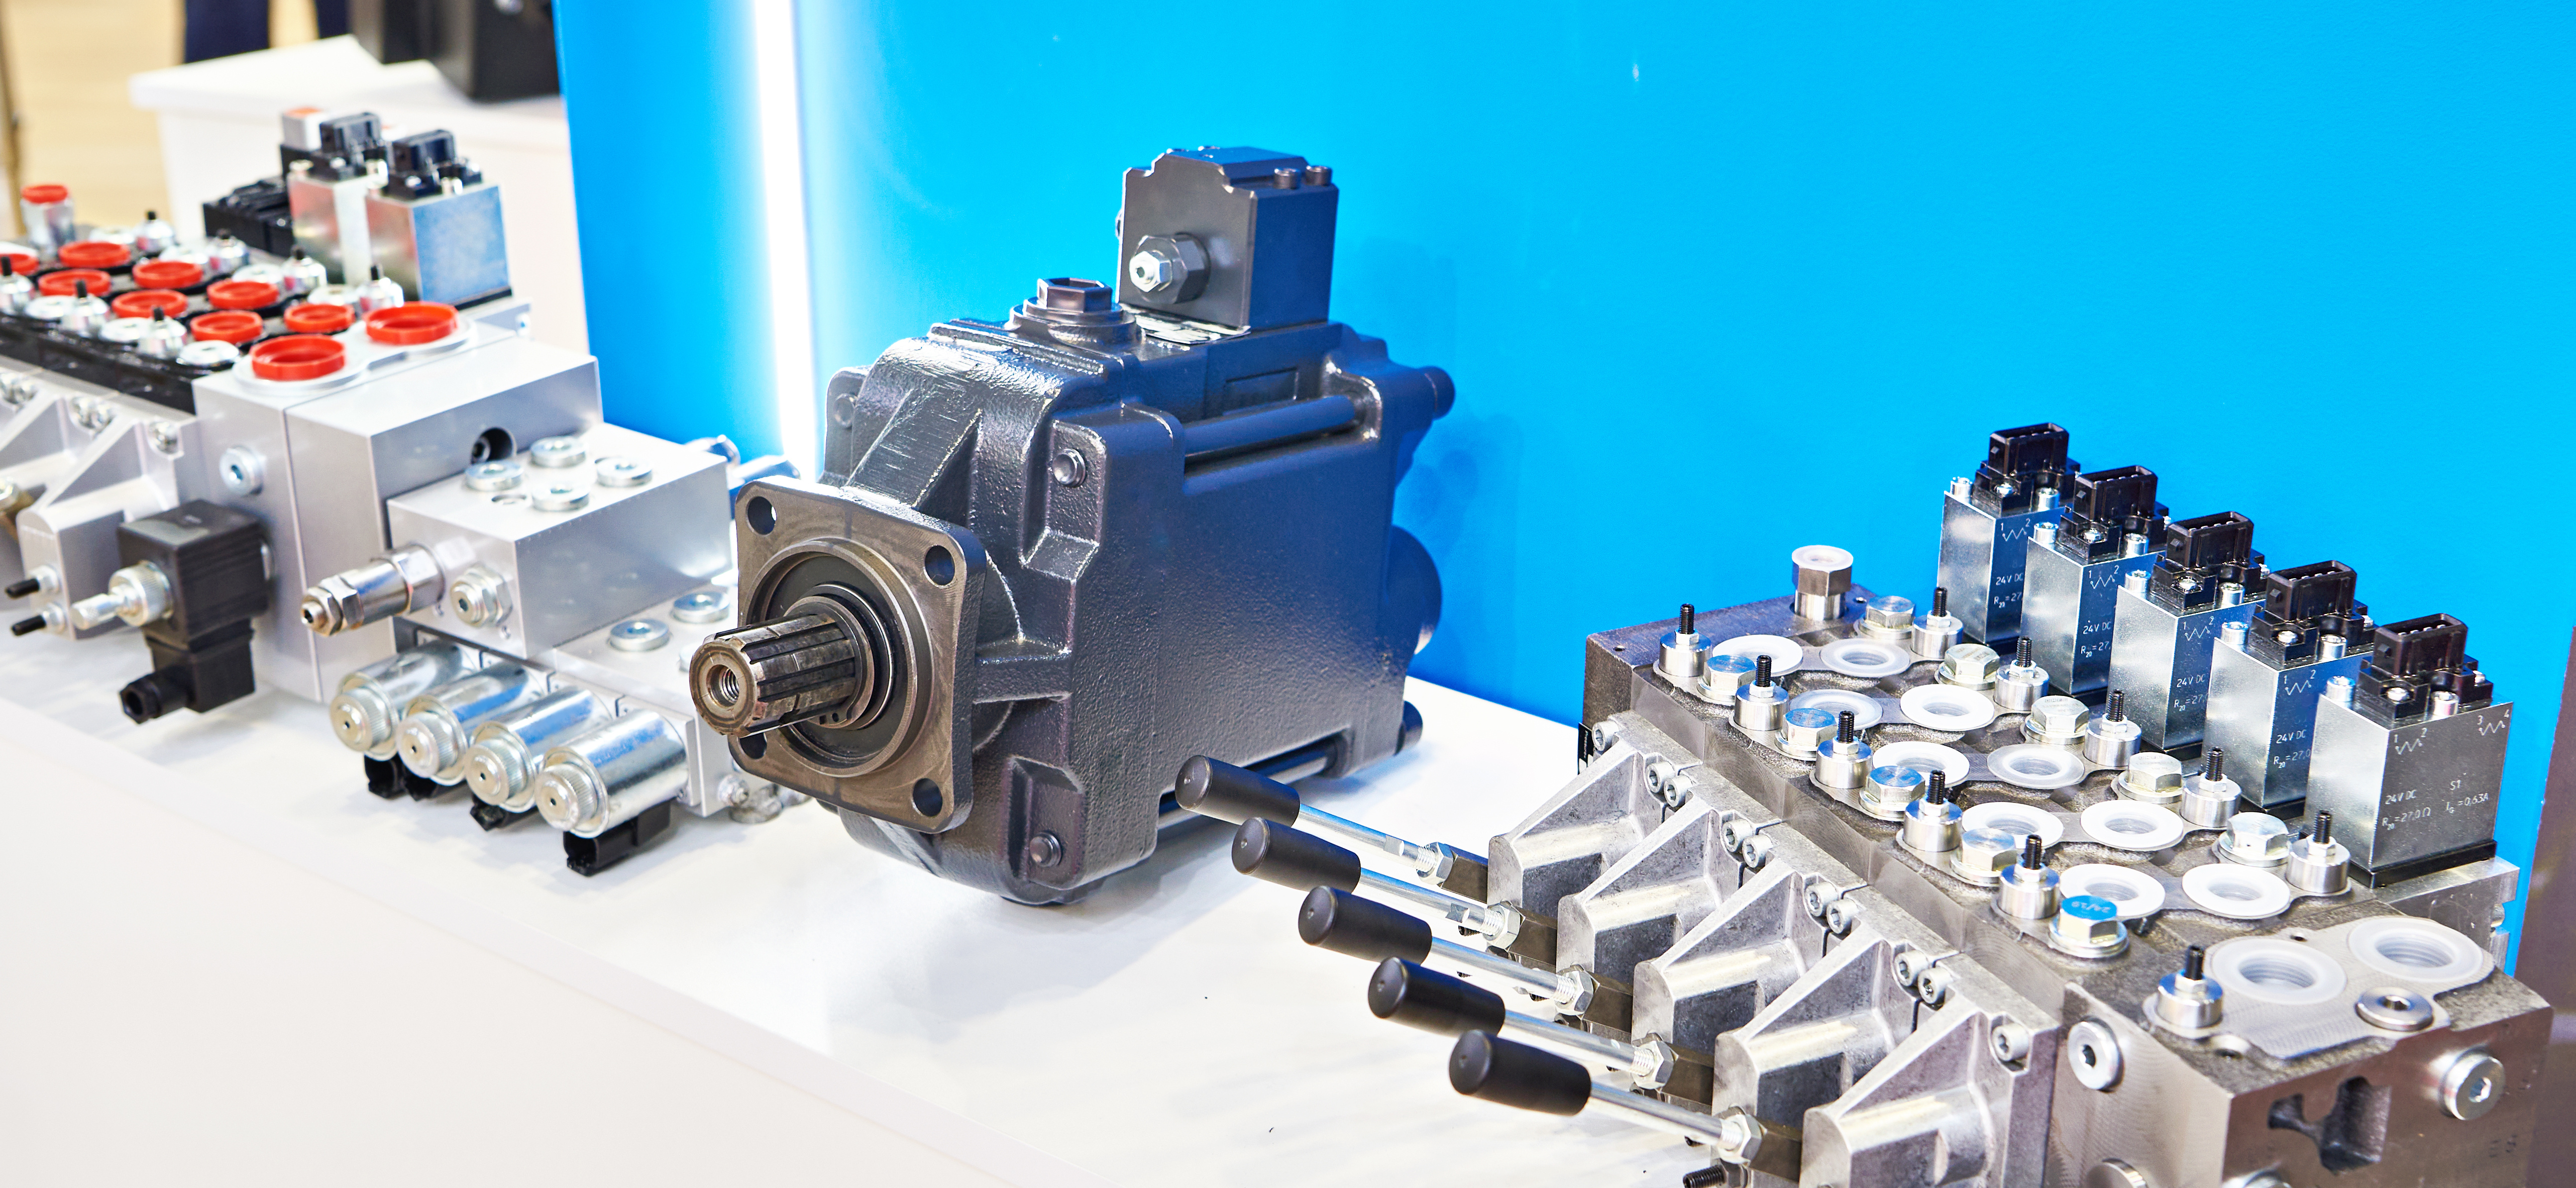
Replacing a hydraulic valve is not always as simple as unbolting one unit and installing another. Before sourcing a replacement, it is worth confirming the valve's type, port size, pressure and flow ratings, mounting interface, and actuation method. Overlooking any of those details can leave you with a valve that bolts on but never controls the circuit correctly, or one that leaks and fails soon after installation. The condition of the surrounding system matters too, since contamination or a worn seal elsewhere can send the same problem back through a brand-new valve.
The sections below explain how to recognize when a valve has failed and what specifications matter, along with when a repair makes more sense than a replacement. Gathering that information before ordering is what prevents delays and rework once installation begins.
What Hydraulic Valves Do
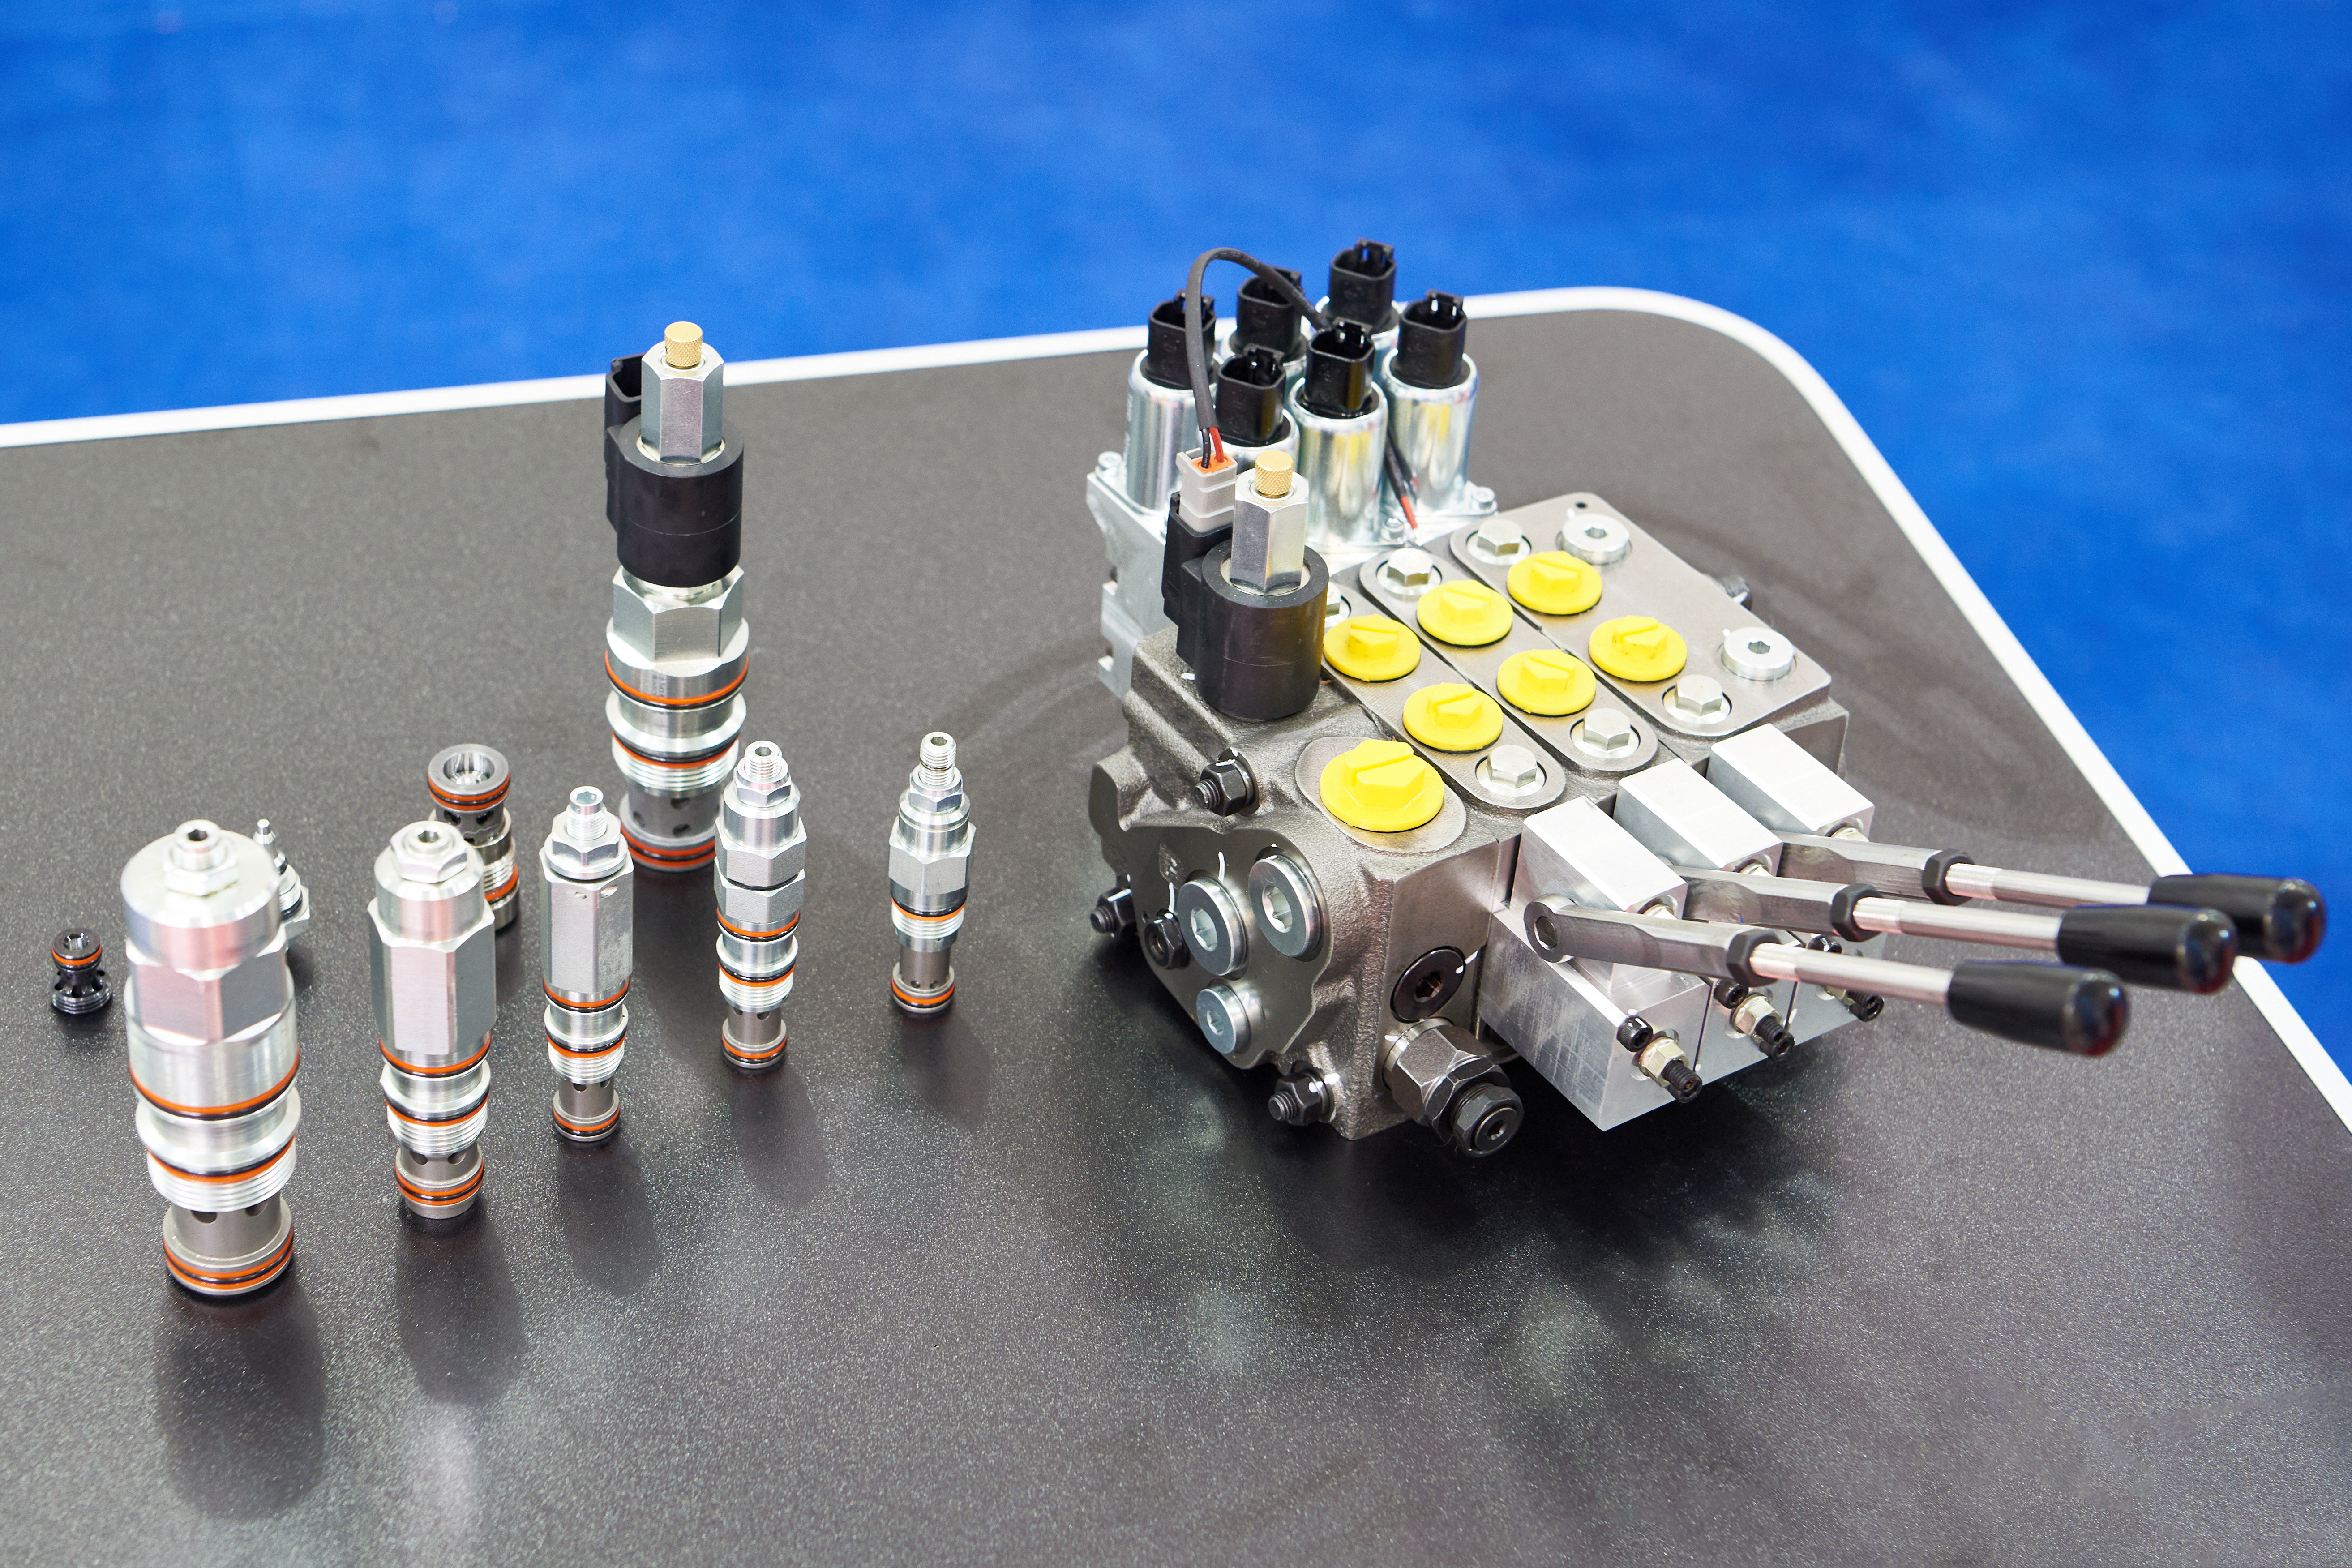
Hydraulic valves regulate fluid inside a circuit, and their role falls into three broad categories that shape how the rest of the equipment behaves. Directional control valves route oil to and from actuators, determining whether a cylinder extends or retracts and whether a motor turns. Pressure control valves, including relief, reducing, sequence, and counterbalance types, protect the system from overpressure and hold pressure where the circuit needs it. Flow control valves regulate how fast oil moves, which sets actuator speed. A single machine often relies on several of these working together, sometimes combined in a monoblock or sectional assembly, and sometimes installed as individual in-line or cartridge valves. Knowing which category the failing valve belongs to is the starting point for both diagnosis and replacement, since the function determines which specifications matter most.
Warning Signs a Hydraulic Valve Needs Replacing
Before pulling a valve, it helps to confirm that the valve is the real source of the problem rather than a sign of trouble elsewhere in the circuit. Several warning signs commonly trace back to the valve itself:
-
Erratic or unpredictable actuator movement
-
A cylinder that drifts or will not hold position under load
-
Sluggish or delayed response when the valve shifts
-
External leakage around the spool, seals, or body
-
Overheating linked to internal leakage past a worn spool
-
A relief valve that no longer holds its pressure setting
Wear inside the valve bore and contamination lodged in the spool account for most of these, and a failed solenoid coil explains the rest on solenoid-operated valves. Several of those issues can be corrected with service rather than a full replacement, which is worth evaluating before ordering a new unit. Scoring in the bore or a cracked body points toward replacement rather than another repair, as does a spool worn past tolerance.
What to Check Before Replacing a Hydraulic Valve
Matching a replacement comes down to a handful of specifications that need to line up with the original valve. The details to confirm include:
-
Valve type and function, which determines how the unit behaves in the circuit, since a relief valve cannot stand in for a directional valve
-
Port size and thread type, which must connect to the existing lines without adapters that introduce new leak points
-
Pressure rating, which has to match or exceed the system's maximum working pressure
-
Flow rating, which drives pressure drop and heat when it is undersized
-
Mounting or interface, which has to match the original pattern
-
Spool configuration and center condition on directional valves, which set how the actuator responds in the neutral position
-
Actuation method, which must match how the original valve was operated
-
Brand and part number, which offer the most direct route to an exact match or a verified cross-reference
Pressure and flow are usually expressed in pounds per square inch (PSI) and gallons per minute (GPM), and a replacement rated below the original on either measure will struggle in service. Mounting ranges from in-line threaded bodies to subplate valves built to National Fluid Power Association (NFPA) interface sizes such as D03 and D05. Cartridge valves add another interface, seating in a machined cavity rather than bolting to a surface. Thread standards matter just as much, since a Society of Automotive Engineers (SAE) straight thread port will not accept a National Pipe Taper (NPT) or British Standard Pipe Parallel (BSPP) fitting. When the part number is still legible on the tag or stamped into the body, it usually leads straight to the specifications or a compatible replacement, and when the markings are gone, measurements and application details take over.
How to Replace a Hydraulic Valve
The exact steps vary by valve style and where the valve sits in the system, though releasing stored energy safely and keeping contamination out apply to nearly every replacement. On complex manifolds or valves in hard-to-reach positions, involving an experienced technician reduces the risk of a repeat failure.
Release the System Pressure and De-energize the Machine
Hydraulic circuits hold stored pressure even after the equipment is shut down, and accumulators can retain energy for some time, so pressure has to be relieved before any connection is opened. Solenoid valves should also be disconnected from electrical power at this stage.
Clean Around the Valve
Contamination ranks among the leading causes of valve failure, so wiping down the valve body and surrounding fittings keeps dirt from entering the system when the lines come loose.
Document and Label Every Connection
Recording the position and orientation of each line, along with the port markings, before removal makes reassembly faster. Photographs and labeled hoses prevent a port from being reversed during installation.
Remove the Valve With the Mounting Supported
A subplate or manifold valve unbolts from its mounting surface, and a cartridge valve lifts out of a machined cavity. In-line valves thread directly off the lines. Support the assembly so weight does not fall on connected lines, and catch residual oil rather than letting it drain into the machine. Slip-in cartridge valves offer a shortcut, since the internal insert lifts out and a new one drops in without disconnecting the surrounding lines.
Inspect the Mounting Surface and Replace the Seals
Checking the subplate face or cartridge cavity for debris and old O-rings left behind prevents leaks after the new valve goes in. Fresh seals sized to the valve are part of a reliable install, since reused hardened seals often leak once the system comes back up to pressure.
Install the Replacement and Torque to Specification
Seat the valve without forcing it, then tighten the mounting bolts or the cartridge to the manufacturer's torque values, working in a cross pattern on subplate valves so the seal compresses evenly. Overtightening can distort the body, while undertightening leaves a leak path.
Reconnect and Test the New Valve
Reconnect the lines and any electrical connectors, then restore pressure gradually and cycle the valve while watching for leaks and any binding as it shifts. For pressure control valves, confirm the setting with a gauge and adjust it to the system's specification before the equipment returns to full duty.
Repair or Replace a Hydraulic Valve?
Not every valve problem calls for a new valve. Worn seals and a dirty spool can often be corrected with a seal kit and a cleaning, and a failed solenoid coil needs only a replacement coil, all at a fraction of the cost of a full unit. Replacement makes more sense when the bore is scored, the body is cracked, the spool is worn beyond tolerance, or the valve keeps failing despite service. The decision usually turns on the condition of the valve weighed against the cost and downtime of a rebuild. Hydraulic Supply Company provides repair and reconditioning services for hydraulic valves alongside its parts inventory, which gives operations a way to evaluate a rebuild before committing to a new component.
Finding the Parts You Need
Replacing a hydraulic valve comes down to identifying what the valve does in the circuit and matching the replacement to the original specifications. The last step is getting the right part in hand without holding up the equipment any longer than necessary. Original specifications point to the most direct replacement, though valves are sometimes discontinued or carry lead times an operation cannot absorb. Cross-referencing closes that gap by comparing the type, port configuration, pressure and flow ratings, mounting interface, and actuation method against available alternatives, and an experienced supplier can recommend a valve that preserves fit and performance when an exact match is not on hand.
Hydraulic Supply Company stocks directional control, pressure control, flow control, check, and cartridge valves from recognized brands, supported by a centralized distribution center and local solution centers staffed by experienced professionals. A legible part number speeds the search, and an unmarked valve can be identified from measurements and application details. Browse our hydraulic valves and accessories to find your replacement, or contact our team for help confirming specifications and cross-referencing an existing unit.
Frequently Asked Questions
How do I know if a hydraulic valve is bad?
Watch for erratic actuator movement, a cylinder that drifts or will not hold position, slow response when the valve shifts, external leaks, overheating, or a relief valve that no longer holds its setting. The likely causes are internal wear or contamination in the spool, with a failed solenoid coil possible on solenoid-operated valves. Confirming the valve is the source before removal avoids swapping a part that was working correctly.
Can a hydraulic valve be repaired instead of replaced?
Yes, in many cases. Worn seals and a dirty spool respond to a seal kit and a cleaning, and a failed coil needs only a replacement coil. A scored bore or cracked body usually calls for a full replacement instead, as does a spool worn past tolerance.
Do I need to depressurize the system before replacing a hydraulic valve?
Yes. Hydraulic systems retain stored pressure after shutdown, and accumulators can hold energy even longer, so pressure has to be released before any line is opened. Solenoid valves should also be disconnected from electrical power.
What information do I need to find a replacement hydraulic valve?
Confirm the valve type and function, port size and thread type, pressure rating, flow rating, mounting or cartridge interface, spool configuration and center condition for directional valves, and the actuation method. A brand and part number, when available, shortens the search considerably.
Can I replace a hydraulic valve with one from a different brand?
Often, yes, provided the specifications cross-reference closely. The port configuration, pressure and flow ratings, mounting interface, and actuation method all need to match the original for the replacement to fit and perform as expected.
Why is my hydraulic valve leaking after replacement?
Leaks after installation usually trace back to reused or incorrectly sized seals, uneven bolt torque, a port thread mismatch that required an adapter, or debris left on the mounting surface. Fresh seals and a clean mounting interface fix most of these, along with torqueing to specification in a cross pattern.
How long does it take to replace a hydraulic valve?
It depends on the valve style and access. An in-line or cartridge valve in an open location can be a short job, while a valve buried in a manifold or a tight equipment frame takes longer. Slip-in cartridge valves are among the fastest, since the insert can be swapped without disconnecting the lines.

Share on Facebook

Share on X

Share on Pinterest
Quick Add Product
Account Summary
Short Code:
Credit Limit:
Current Balance:
Recent Posts

Tell us what you need and we'll get back to you.
Fields marked * are required.
Thanks — your inquiry's on its way